0%

正确的做法

1
2
3
4
5
6
7
8
9
10
11
#!/bin/sh

STRING=

if [ -z "$STRING" ]; then
echo "STRING is empty"
fi

if [ -n "$STRING" ]; then
echo "STRING is not empty"
fi

输出正确的结果:

1
2
root@james-desktop:~# ./zerostring.sh
STRING is empty

错误的做法

1
2
3
4
5
6
7
8
9
10
11
#!/bin/sh

STRING=

if [ -z $STRING ]; then
echo "STRING is empty"
fi

if [ -n $STRING ]; then
echo "STRING is not empty"
fi

输出错误结果:

1
2
3
root@james-desktop:~# ./zerostring.sh
STRING is empty
STRING is not empty

总结

记得在给变量加上双引号””

参考链接

https://www.cnblogs.com/cute/archive/2011/08/26/2154137.html

在 shell 脚本里使用 ssh 在远程主机执行脚本时无法关闭连接

例如

1
ssh user@ipaddress '~/my_script.sh'

脚本执行完毕连接不会关闭, 需要你手动 Ctrl + C 关闭连接.

解决方案

1
ssh user@ipaddress '~/my_script.sh && exit'

当你在远程主机执行的脚本由本地主机推送的话

例如

1
ssh user@remoteNode < test.sh

你可以在本地脚本里添加

1
kill -SIGHUP $PPID

kill 掉当前的 ssh

但是这样会导致, 你尝试捕获 SSH 是否成功执行时, 总是得到失败的结果.

参考链接

https://superuser.com/questions/207453/ssh-and-shell-through-ssh-how-to-exit?noredirect=1&lq=1

连接时加入StrictHostKeyChecking=no

例如

1
ssh -o StrictHostKeyChecking=no root@192.168.1.100

动态查看日志

1
tail -f  /var/log/gitlab/gitlab-rails/production.log

迁移或恢复备份后部分操作服务端响应500

进入容器, 运行

1
gitlab-rails dbconsole

依次清除 token, 注意! 这样会清除全部的 token, 不过解决问题简单粗暴

1
2
3
4
5
6
-- clear project tokens
UPDATE projects SET runners_token = null, runners_token_encrypted = null;
-- clear group tokens
UPDATE namespaces SET runners_token = null, runners_token_encrypted = null;
-- clear instance tokens
UPDATE application_settings SET runners_registration_token_encrypted = null;

造成这个问题的原因是因为没有备份这个文件

1
gitlab-secrets.json

以后操作的时候还是要多看看官方文档, 文档说的很清楚…

https://docs.gitlab.com/ee/raketasks/backup_restore.html

1
2
3
4
5
6
7
8
9
10
11
12
13
14
15
16
When the secrets file is lost
If you didn’t back up the secrets file, you must complete several steps to get GitLab working properly again.

The secrets file is responsible for storing the encryption key for the columns that contain required, sensitive information. If the key is lost, GitLab can’t decrypt those columns, preventing access to the following items:

CI/CD variables
Kubernetes / GCP integration
Custom Pages domains
Project error tracking
Runner authentication
Project mirroring
Web hooks
In cases like CI/CD variables and runner authentication, you can experience unexpected behaviors, such as:

Stuck jobs.
500 errors.

Whoops, GitLab is currently unavailable.

可以正常查看项目列表, 但是无法进入项目, 错误提示

1
Whoops, GitLab is currently unavailable.

项目基于docker容器部署, 首先查看日志, 发现一条错误, 权限拒绝.

1
{"error":"open /var/opt/gitlab/gitaly/gitaly.pid: permission denied","level":"fatal","msg":"find gitaly","time":"2021-05-05T18:05:26Z","wrapper":3514}

google 发现, 这个文件在 docker 容器里的权限应该是 git:git

但是我进入容器后发现该文件的权限为 root:root

1
2
3
4
5
6
-rw-r--r-- 1 root root   63 May  5 16:51 RUBY_VERSION
-rw-r--r-- 1 root root 23 May 5 17:56 VERSION
-rw-r----- 1 root git 819 May 5 17:56 config.toml
-rw------- 1 root root 3 Mar 8 18:57 gitaly.pid
srwxr-xr-x 1 root root 0 Mar 8 18:57 gitaly.socket
drwx------ 2 git root 4096 Mar 8 18:57 internal_sockets

修改权限

1
chown git:git gitaly.pid

Errno::EEXIST: File exists @ dir_s_mkdir - /var/opt/gitlab/backups/repositories

备份的时候出现这个问题, 十有八九是权限问题.

直接

1
chmod -R 777 bakcups

参考连接

https://forum.gitlab.com/t/local-gitlab-is-not-longer-working/29319/19
https://docs.gitlab.com/ee/raketasks/backup_restore.html

Koolshare-Clash 的 Github 地址

https://github.com/SukkaW/Koolshare-Clash

这个项目已经两年没更新了, 项目自带的 Clash 版本为 Clash v0.20.0 已经很旧了.

目前为止 Clash 的最新版本为 Clash v1.5.0

笔者尝试更新 Clash 版本, 但是遇到的一些问题, 这里记录一下解决方案.

更新 Clash 版本

笔者的路由器为LEDE_X86 for linux, 首先通过 SSH 登录后台.

切换到目录

1
cd /koolshare/bin

去 Github 下载对应的平台的最新的 Clash

1
https://github.com/Dreamacro/clash

删除旧的 Clash

1
rm clash

把新的 Clash 拷贝进去, 然后更改权限

1
chmod 755 clash

然后去 Koolshare 重启 Clash

可能出现的问题

访问代理后台看不见配置的代理

出现这种原因是因为 0.20.0 的配置文件和 1.5.0 配置文件有些字段更改了, 需要更改 Clash 的配置文件

访问该网址可以查看最新的配置文件规则

1
https://github.com/Dreamacro/clash/wiki/configuration

一些差异

1
2
3
4
5
6
7
8
0.20.0 -> Proxy
1.5.0 -> proxies

0.20.0 -> Proxy Group
1.5.0 -> proxy-groups

0.20.0 -> Rule
1.5.0 -> rules

配置文件从1.0.0版本开始更改.

1
2
3
4
5
6
# 停止docker
docker stop $(docker ps -a | grep "Exited" | awk '{print $1 }')
# 删除docker
docker rm $(docker ps -a | grep "Exited" | awk '{print $1 }')
# 删除images
docker rmi $(docker images | grep "none" | awk '{print $3}')

参考链接

https://www.jianshu.com/p/d06830de219f

背景

生命不息,折腾不止。在老家布置了一台服务器用于家庭影音中心,现在在新家,与老家相隔3000多公里,但是新家的服务器因为新装一无所有。此时此刻,突发奇想,我怎么能把老家的服务器里下载好的资源同步到新家的服务器上?

解决方案:

    1. 把老家服务器搬过来
    1. 从新家访问老家的NAS,然后通过HTTP下载
    1. 自己写个同步程序部署在两台服务器上
    1. 或许可以用BT下载的方式从老家下载过来

方案1直接pass。

方案2虽然也可以,但是群晖的连接好像直接复制到Aria2里下载不了,我可忍受不了下载一部50G的电影用浏览器自带的下载工具,而且还没有进度提示

方案3,emmmm……等有空再说

方案4,自己假设一台BT Trakcer服务器,然后做个种子下载,目前能想到的一个最佳方案

查阅相关资料,看看有没有现成的工具可以使用。

Searching …

!!!可以使用 OpenTracker 这个现成的工具来搭建。

那么问题来了,为了不搞乱服务器的环境,有没有现成的Docker镜像?

Continue searching …

在笔者孜孜不倦的努力下,真的发现了有人已经做好了镜像。

直接拉取镜像

1
docker pull lednerb/opentracker-docker

那么接下来如何启动一个容器?,我推荐docker-compose

1
2
3
4
5
6
7
8
version: '3'
services:
opentracker:
image: lednerb/opentracker-docker
restart: unless-stopped
ports:
- 6969:6969
- 6969:6969/udp

当然你也可以直接

1
docker run -dit --name opentracker -p 6969:6969/udp -p 6969:6969 lednerb/opentracker-docker

好了。大功告成。

那么我怎么知道它运行了没有,怎么查看状态?

举个栗子,比如我假设在了yourhostname.com这台主机上,那么访问

1
http://yourhostname.com:6969/state

或者访问更详细的内容

1
http://yourhostname.com:6969/state?mode=everything

即可看到这家伙有没有在认真工作咯!

20201224220240

emmmmm…..刚搭建好,还没传种子。

我们创建一个种子,传上去试试看。

创建种子的时候Tracker服务器填:

1
http://yourhostname.com:6969/announce

或者

1
udp://yourhostname.com:6969/announce

在Transmission里看一下。。。

20201224221255

一切OK。。。

到后台看一下

20201224221518

一切OK。。。可以看到已经增加了一个种子。

下载试试看。。

20201224222117

OK。。。已经出现一个peer了!

接下来就像下载BT一样,不过并不会有更多的peer出现,因为只有我自己在做种自己在下。。。

https://hub.docker.com/r/lednerb/opentracker-docker/

为了方便随时随地测试一些算法,做一些研究。笔者在自己的服务器上安装了jupyter-lab,这个是jupyter的下一代版本。但是因为不想搞乱自己服务器的环境,于是尝试寻找看看有没有jupyter的docker镜像,发现还真的有官方出的镜像。

官方出了很多镜像,根据不同的需求选择合适的镜像。本次搭建笔者选择了jupyter/datascience-notebook这个镜像,具体镜像列表参考:

https://jupyter-docker-stacks.readthedocs.io/en/latest/using/selecting.html

拉取镜像

1
docker pull jupyter/datascience-notebook

运行一个容器

1
docker run -p 8888:8888 jupyter/datascience-notebook
1
2
3
4
5
6
7
8
9
10
11
12
13
14
15
16
17
18
root@ubuntu:~# docker run -p 8888:8888 jupyter/datascience-notebook
Executing the command: jupyter notebook
[I 12:28:00.559 NotebookApp] Writing notebook server cookie secret to /home/jovyan/.local/share/jupyter/runtime/notebook_cookie_secret
[I 12:28:02.995 NotebookApp] JupyterLab extension loaded from /opt/conda/lib/python3.8/site-packages/jupyterlab
[I 12:28:02.996 NotebookApp] JupyterLab application directory is /opt/conda/share/jupyter/lab
[I 12:28:03.006 NotebookApp] Serving notebooks from local directory: /home/jovyan
[I 12:28:03.006 NotebookApp] Jupyter Notebook 6.1.5 is running at:
[I 12:28:03.007 NotebookApp] http://a0a0fecd00d5:8888/?token=2f725d16b757283384db037ff1707b590eca49d9ac037f3b
[I 12:28:03.007 NotebookApp] or http://127.0.0.1:8888/?token=2f725d16b757283384db037ff1707b590eca49d9ac037f3b
[I 12:28:03.007 NotebookApp] Use Control-C to stop this server and shut down all kernels (twice to skip confirmation).
[C 12:28:03.019 NotebookApp]

To access the notebook, open this file in a browser:
file:///home/jovyan/.local/share/jupyter/runtime/nbserver-7-open.html
Or copy and paste one of these URLs:
http://a0a0fecd00d5:8888/?token=2f725d16b757283384db037ff1707b590eca49d9ac037f3b
or http://127.0.0.1:8888/?token=2f725d16b757283384db037ff1707b590eca49d9ac037f3b

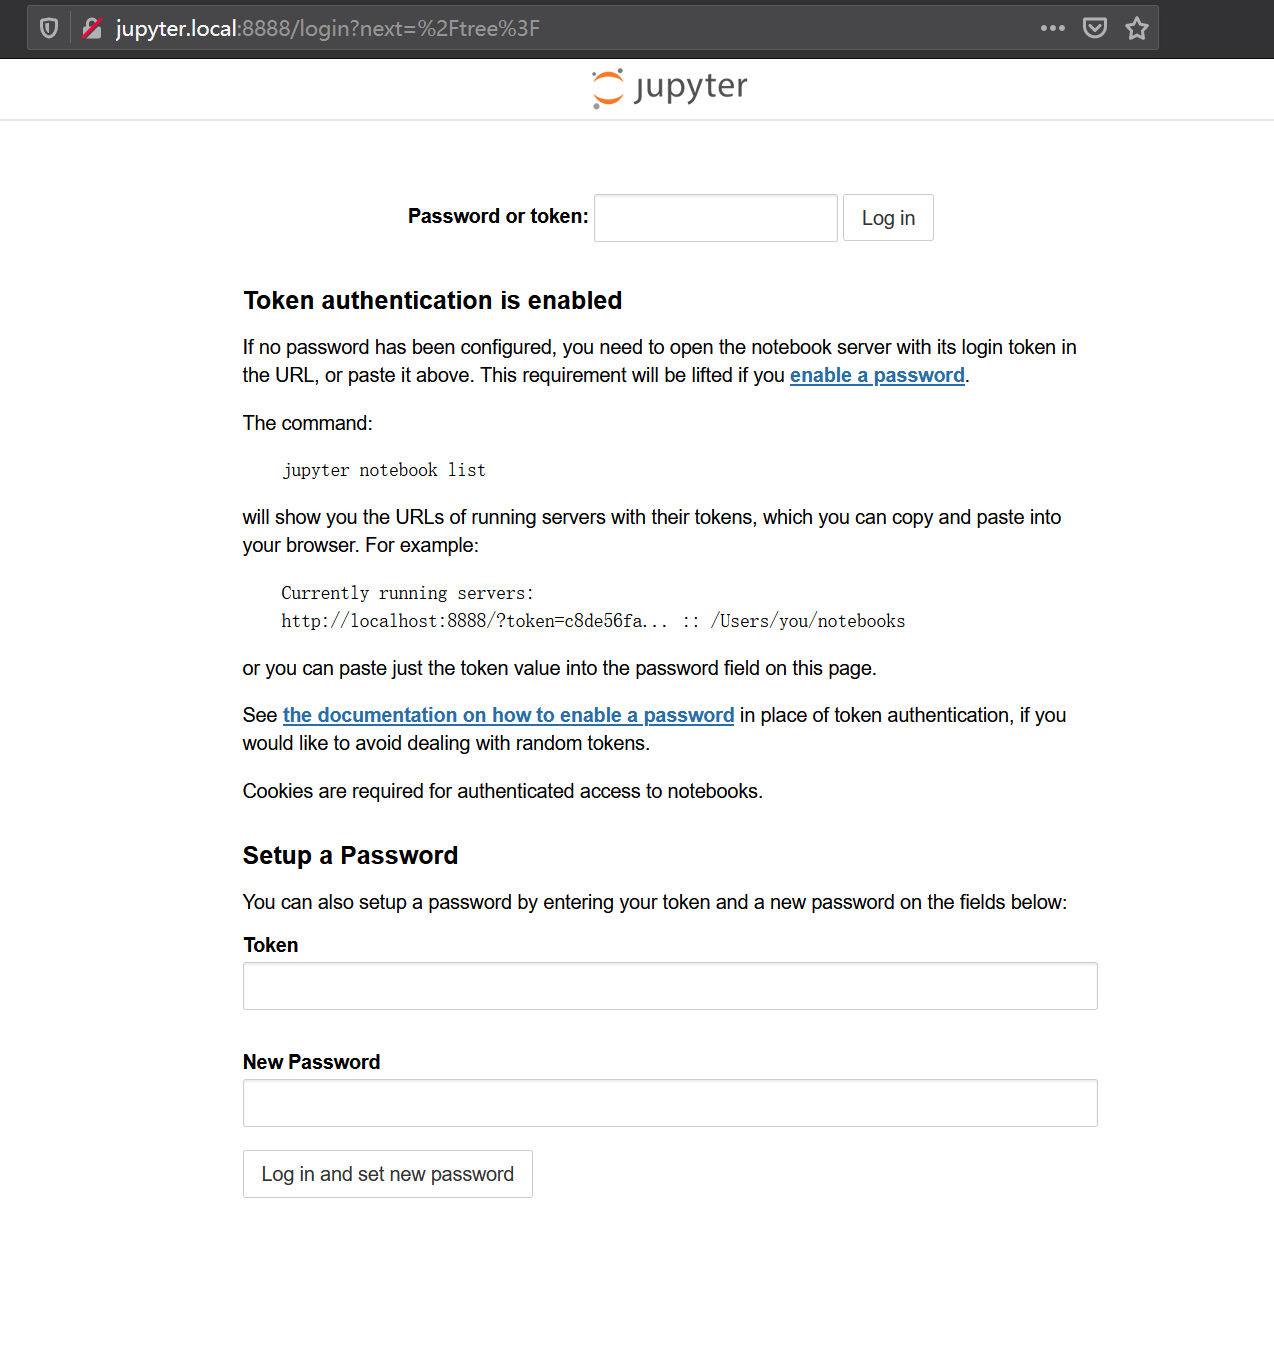
访问你部署docker的那台主机,例如本次我部署在jupyter.local这台主机上,我们访问http://jupyter.local:8888会看到如下界面。
20201222203043

你可以使用token登录或使用token设置一个新密码。本次的token为2f725d16b757283384db037ff1707b590eca49d9ac037f3b

20201222203206

用token设置一个新密码然后登录。

20201222203257

这样就进来了。

但是这样我们的所有工作都在这个容器里,没有挂载外部的数据卷进来,当容器消失后我们的工作内容也将烟消云散。所以我们需要挂载外部的数据卷进来。

这里推荐使用docker-compose来启动容器,yaml格式的语法阅读非常清晰。

ubuntu 可以使用以下命令安装

1
apt install docker-compose -y

这里我们来看一个 docker compose 模板

1
2
3
4
5
6
7
8
9
10
11
12
13
14
15
16
17
18
19
version: "3.1"
services:
Jupyter:
image: jupyter/datascience-notebook:latest
tty: true
restart: always
container_name: jupyter
user: root
ports:
- "8888:8888"
volumes:
- "${PWD}/work:/home/jovyan/work"
environment:
- JUPYTER_ENABLE_LAB=yes
- GRANT_SUDO=yes
logging:
driver: "json-file"
options:
max-size: "100m"

在当前目录下新建一个work目录, 我们把这个目录挂载到容器里。
JUPYTER_ENABLE_LAB=yes启用jupyter-lab,这个是jupyter的下一代版本。

1
2
3
4
root@ubuntu:/home/naonao# mkdir work
root@ubuntu:/home/naonao# ls
work
root@ubuntu:/home/naonao#

例如我在/home/naonao这个目录下新建一个work文件夹,然后再本目录下创建一个docker-compose.yaml文件,复制上面的内容进去。

运行容器

1
docker-compose up
1
2
3
4
5
6
7
8
9
10
11
12
13
14
15
16
17
18
19
20
21
22
23
24
25
26
root@ubuntu:/home/naonao# nano docker-compose.yaml
root@ubuntu:/home/naonao# ls
docker-compose.yaml work
root@ubuntu:/home/naonao# docker-compose up
Creating network "naonao_default" with the default driver
Creating jupyter ... done
Attaching to jupyter
jupyter | Set username to: jovyan
jupyter | usermod: no changes
jupyter | Granting jovyan sudo access and appending /opt/conda/bin to sudo PATH
jupyter | Executing the command: jupyter lab
jupyter | [I 12:40:59.811 LabApp] Writing notebook server cookie secret to /home/jovyan/.local/share/jupyter/runtime/notebook_cookie_secret
jupyter | [I 12:41:00.953 LabApp] JupyterLab extension loaded from /opt/conda/lib/python3.8/site-packages/jupyterlab
jupyter | [I 12:41:00.954 LabApp] JupyterLab application directory is /opt/conda/share/jupyter/lab
jupyter | [I 12:41:00.957 LabApp] Serving notebooks from local directory: /home/jovyan
jupyter | [I 12:41:00.958 LabApp] Jupyter Notebook 6.1.5 is running at:
jupyter | [I 12:41:00.958 LabApp] http://051c0b8b860b:8888/?token=a37dc92a50b7b6f3fb0f01abfee6a374b5fb74d23a0a3114
jupyter | [I 12:41:00.958 LabApp] or http://127.0.0.1:8888/?token=a37dc92a50b7b6f3fb0f01abfee6a374b5fb74d23a0a3114
jupyter | [I 12:41:00.958 LabApp] Use Control-C to stop this server and shut down all kernels (twice to skip confirmation).
jupyter | [C 12:41:00.963 LabApp]
jupyter |
jupyter | To access the notebook, open this file in a browser:
jupyter | file:///home/jovyan/.local/share/jupyter/runtime/nbserver-14-open.html
jupyter | Or copy and paste one of these URLs:
jupyter | http://051c0b8b860b:8888/?token=a37dc92a50b7b6f3fb0f01abfee6a374b5fb74d23a0a3114
jupyter | or http://127.0.0.1:8888/?token=a37dc92a50b7b6f3fb0f01abfee6a374b5fb74d23a0a3114

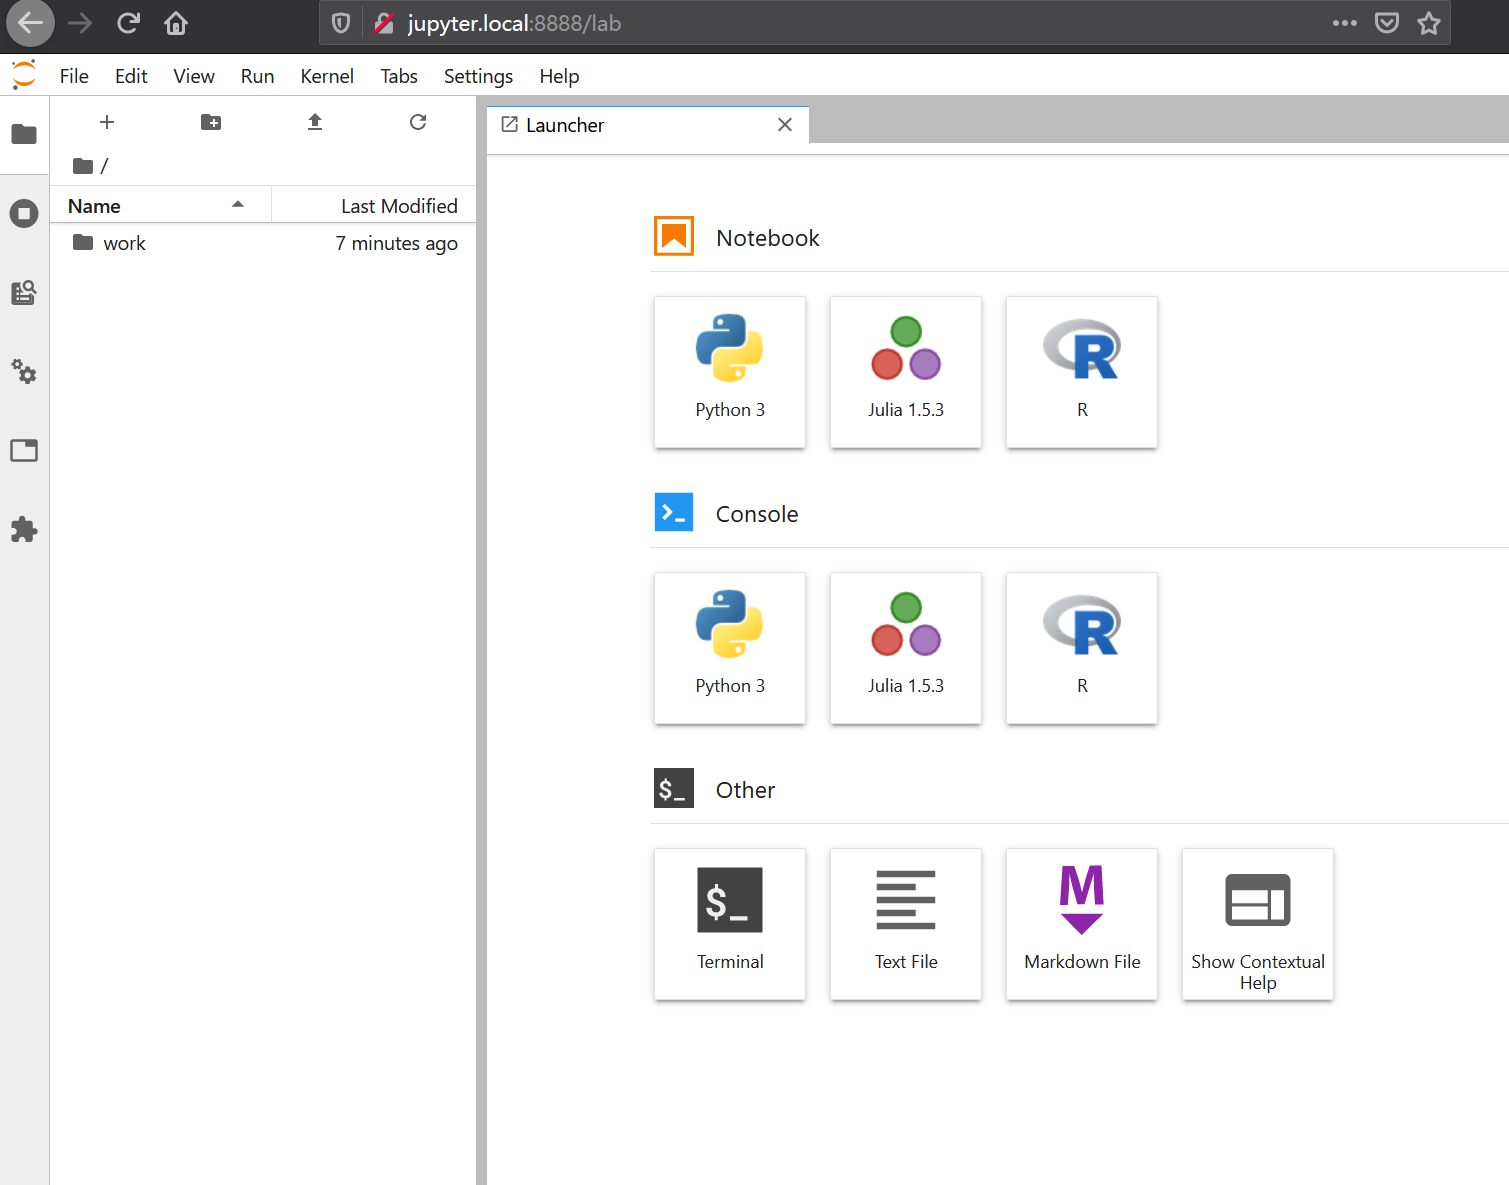
同刚才一样,你可以用token设置一个密码,或者也可以直接访问连接http://jupyter.local:8888/?token=a37dc92a50b7b6f3fb0f01abfee6a374b5fb74d23a0a3114,这里注意访问你部署docker的主机的地址,本例我部署在jupyter.local主机。我们将看到jupyer-lab的界面。
20201222204526

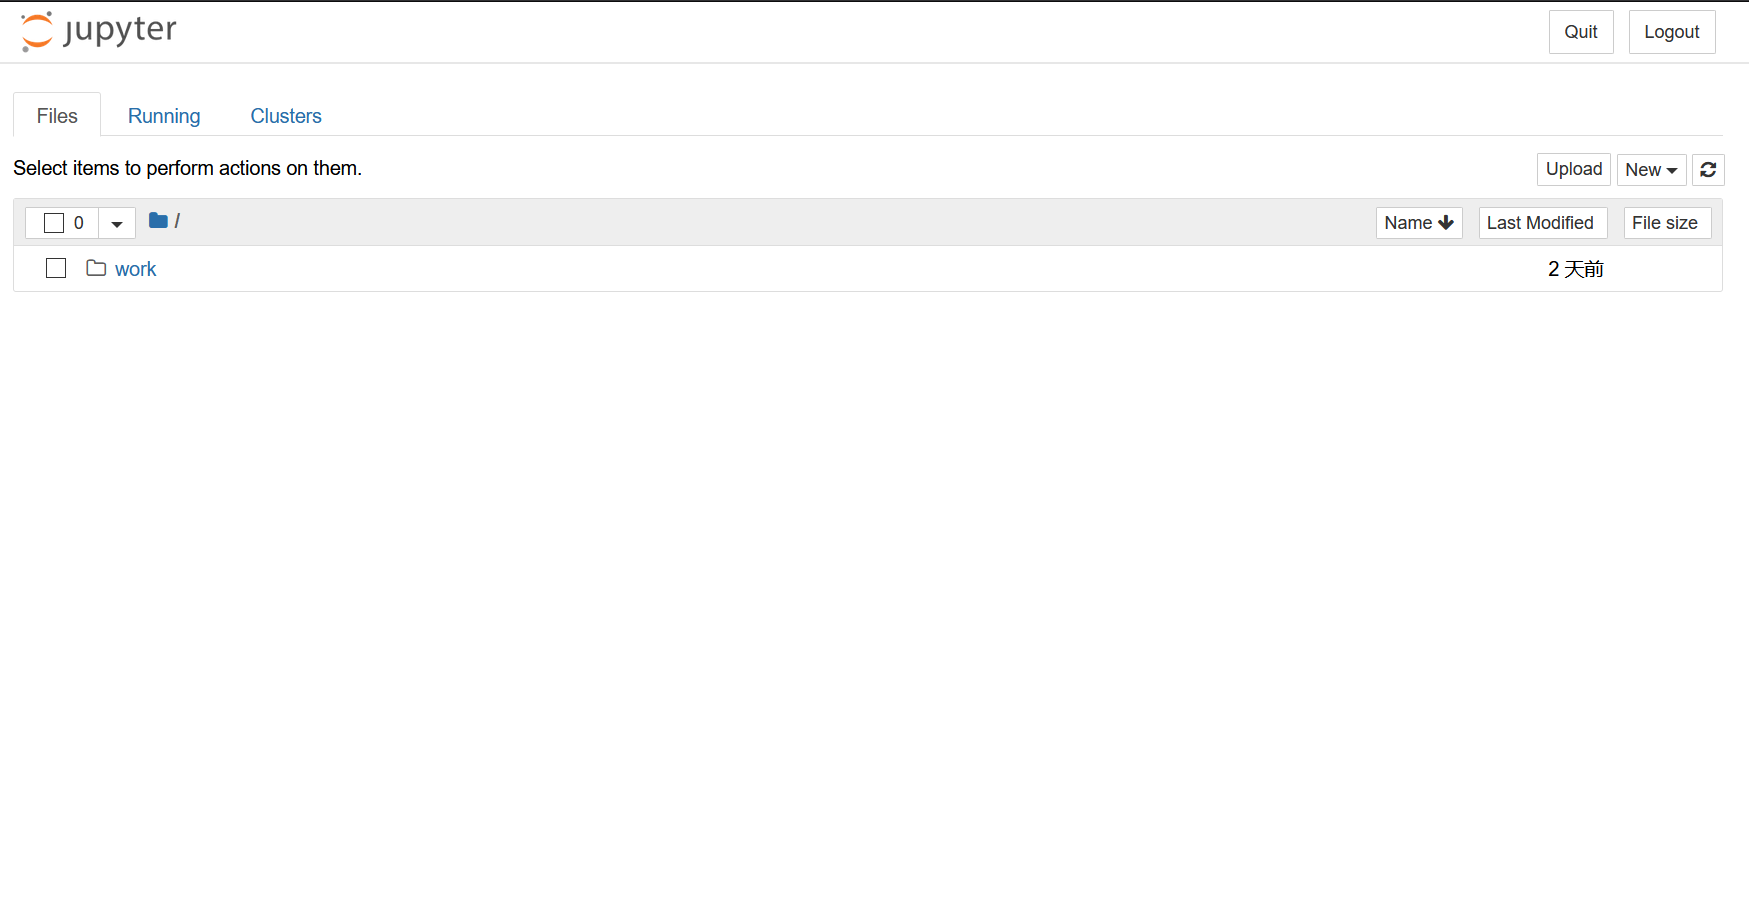
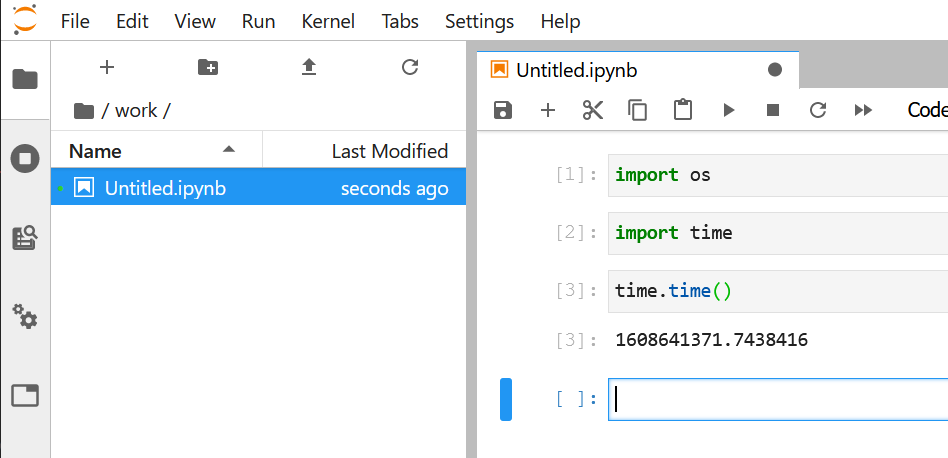
进入/work目录新建一个文件。

20201222204649

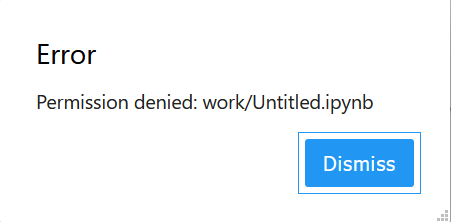
我的得到了一个Permission denied错误。

查阅资料发现

1
You must grant the within-container notebook user or group (NB_UID or NB_GID) write access to the host directory (e.g., sudo chown 1000 /some/host/folder/for/work).

https://jupyter-docker-stacks.readthedocs.io/en/latest/using/common.html

你必须允许容器的用户或组写你设置的这个目录

例如我挂载目录/home/naonao/work到容器里, 那么我需要更改这个目录的权限.chown 1000 /home/naonao/work

重启容器,问题解决。
20201222204942

1
2
3
4
root@ubuntu:/home/naonao# cd work
root@ubuntu:/home/naonao/work# ls
Untitled.ipynb
root@ubuntu:/home/naonao/work#

如果把它架设在公共云上,那么我们可以通过域名在任意位置访问到jupyter环境。

Nginx + SSL

通过Nginx反向代理并使用SSL加密HTTP

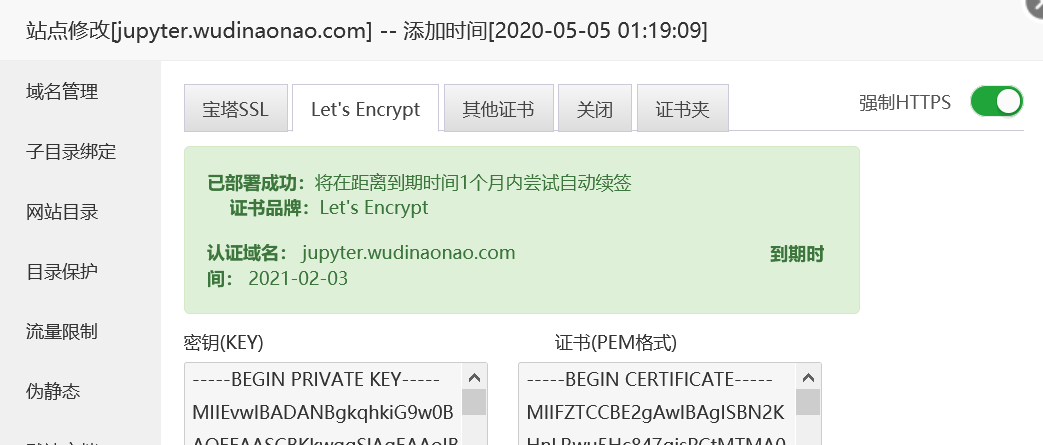
笔者用宝塔新建了一个静态网站,并设置了Let’s Encrpyt证书。
20201222205257

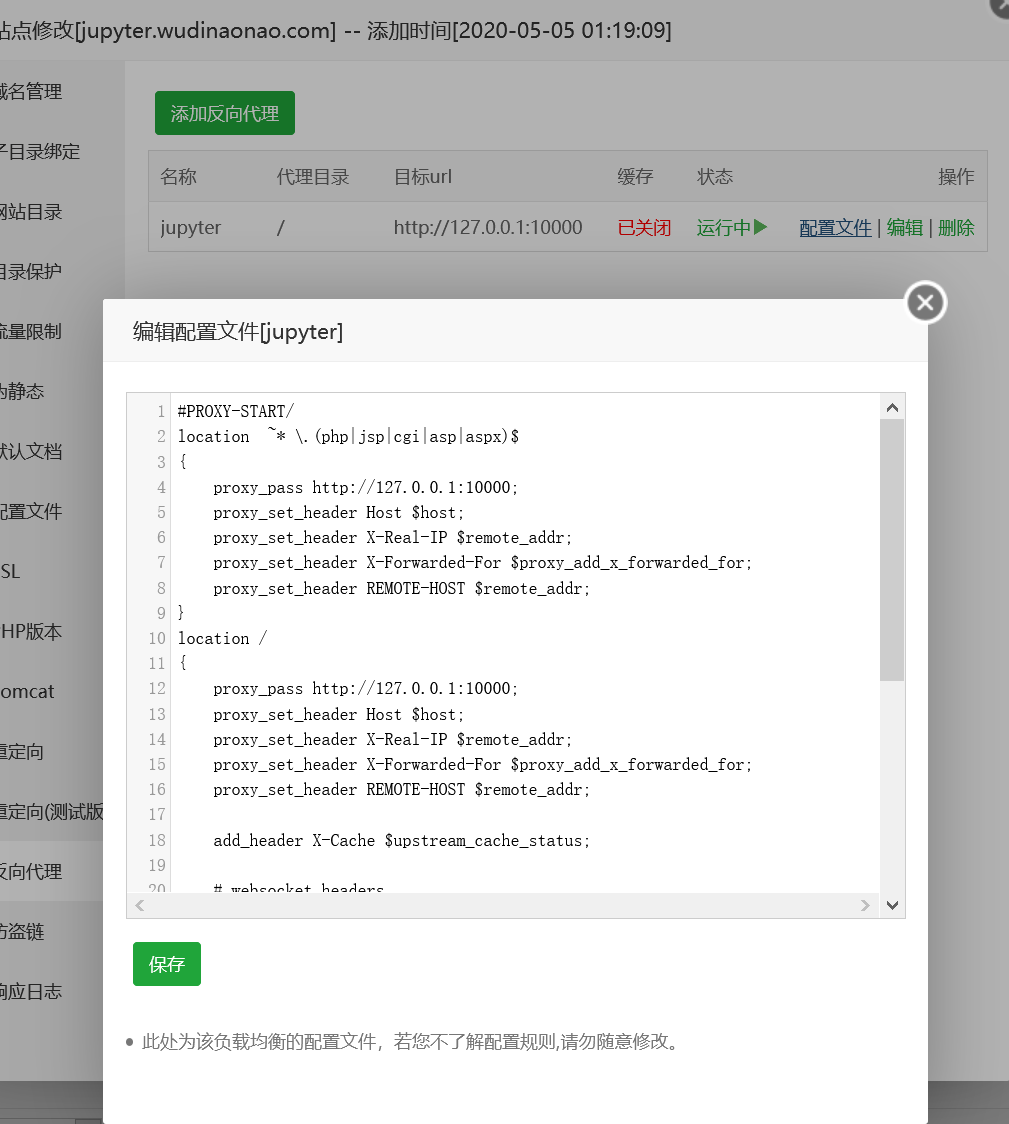
在华为云上部署docker,因为8888端口被占用,所以本次使用10000端口,在宝塔面板添加一个反向代理,当然你也可以自己配置Nginx。
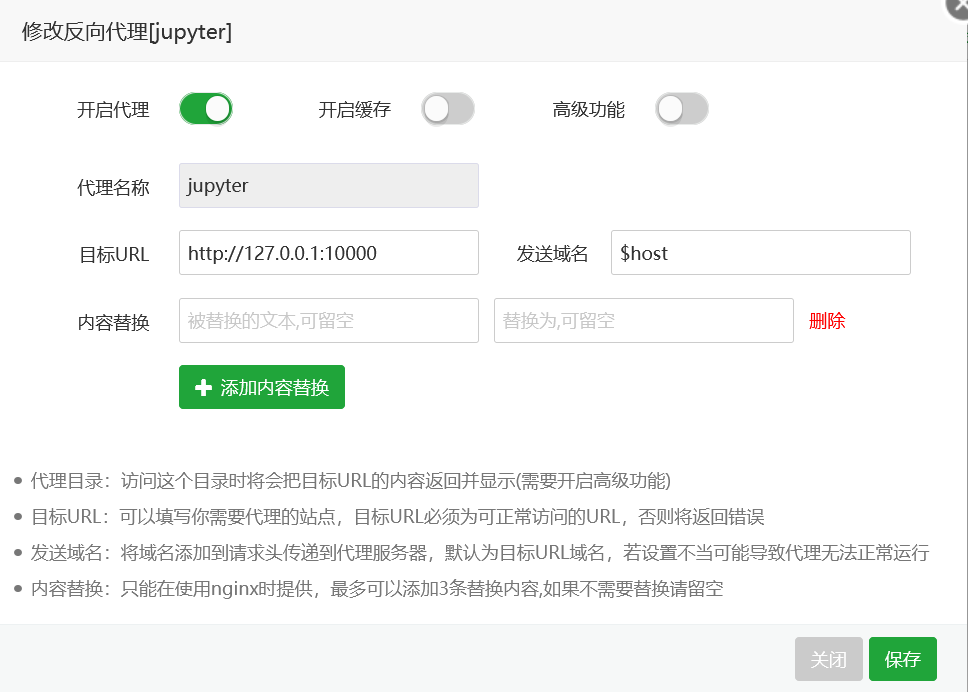
20201222205721

完成单击配置文件

20201222210023

增加websocket

1
2
3
4
5
6
7
# websocket headers
proxy_http_version 1.1;
proxy_set_header Upgrade $http_upgrade;
proxy_set_header Connection $connection_upgrade;
proxy_set_header X-Scheme $scheme;

proxy_buffering off;

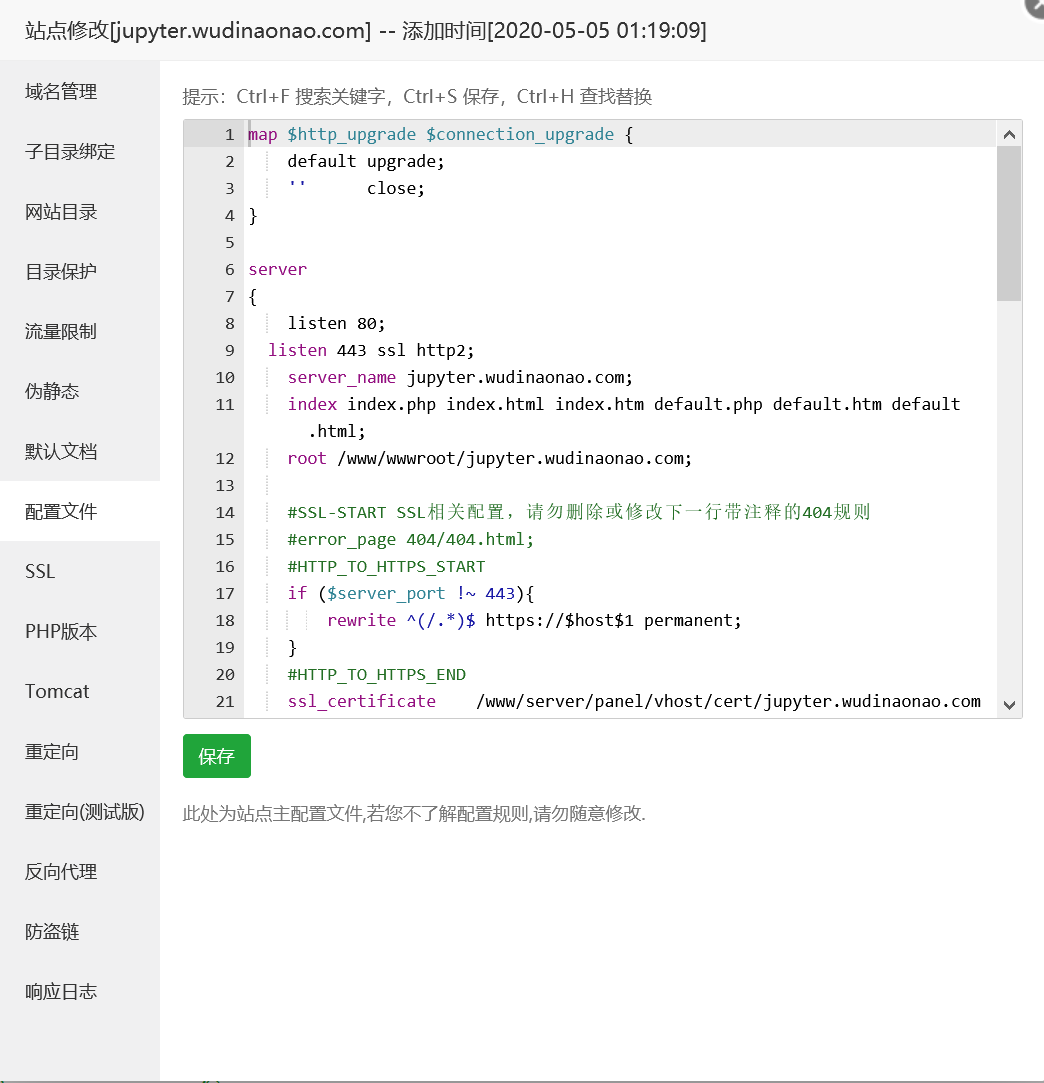
然后在点击左边目录的配置文件增加

1
2
3
4
map $http_upgrade $connection_upgrade {
default upgrade;
'' close;
}

20201222205825

保存。

访问https://jupyter.wudinaonao.com一切正常
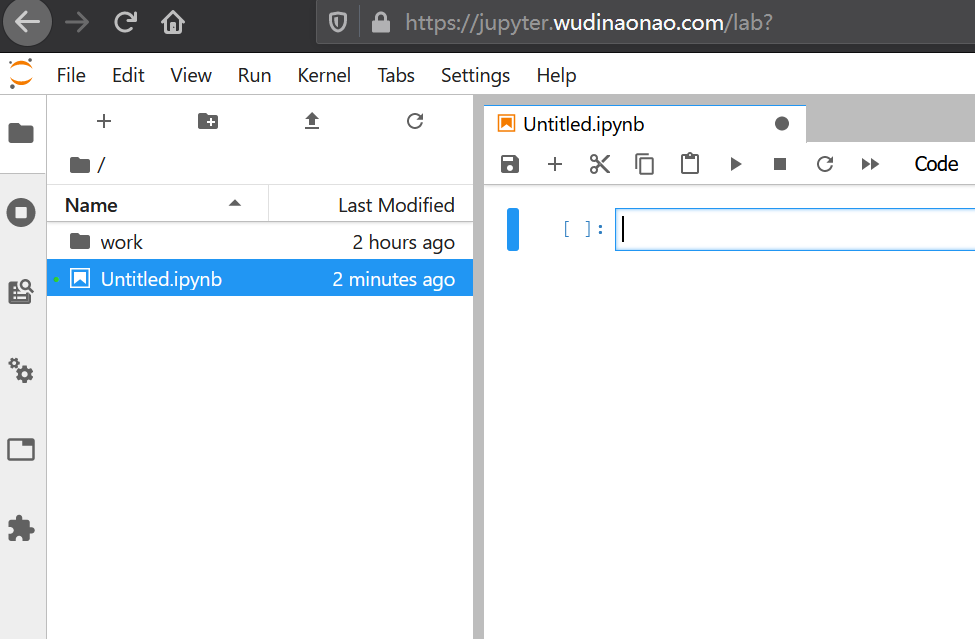
20201222210506

可能遇到的问题

Python3 connecting

有时候通过Nginx反向代理会出现可以访问界面但是无法连接到python,这是因为没有配置websocket导致。

通常出现在这种情况下,用户通过HTTPS访问Nginx的反向代理。即

user —https—> nginx —http—> docker

https://jupyter-docker-stacks.readthedocs.io/en/latest/using/selecting.html

https://jupyterhub.readthedocs.io/en/stable/reference/config-proxy.html