0%

1
2
3
4
5
6
7
8
9
10
11
12
13
14
15
16
17
18
19
20
21
22
#!/usr/bin/env bash

USERNAME="docker_username"
PASSWORD="docker_password"
ORGANIZATION="organization"
IMAGE="image"
TAG="tag"

login_data() {
cat <<EOF
{
"username": "$USERNAME",
"password": "$PASSWORD"
}
EOF
}

TOKEN=`curl -s -H "Content-Type: application/json" -X POST -d "$(login_data)" "https://hub.docker.com/v2/users/login/" | jq -r .token`

curl "https://hub.docker.com/v2/repositories/${ORGANIZATION}/${IMAGE}/tags/${TAG}/" \
-X DELETE \
-H "Authorization: JWT ${TOKEN}"

https://devopsheaven.com/docker/dockerhub/2018/04/09/delete-docker-image-tag-dockerhub.html

1.Singleton mode 单例模式

一个类最多创建一个实例

装饰器实现

1
2
3
4
5
6
7
8
9
10
11
12
13
14
15
# 装饰器实现
def singleton(class_):
instances = {}
def getInstance(*args, **kwargs):
if class_ not in instances:
instances[class_] = class_(*args, **kwargs)
return instances[class_]
return getInstance


@singleton
class MyClass(object):

pass

元类实现

1
2
3
4
5
6
7
8
9
10
11
12
# 元类实现
class Singleton(type):
_instances = {}
def __call__(cls, *args, **kwargs):
if cls not in cls._instances:
cls._instances[cls] = super(Singleton, cls).__call__(*args, **kwargs)
return cls._instances[cls]


class MyClass(metaclass=Singleton):

pass

2.The Factory Pattern 工厂模式

解决对象创建问题

工厂模式属于创建型模式, 它提供了一种创建对象的最佳方式.
在工厂模式中, 我们在创建对象时不会对客户端暴露创建逻辑, 并且时通过使用一个共同的接口来指向新创建的对象.

1
2
3
4
5
6
7
8
9
10
11
12
13
14
15
16
17
18
19
20
21
22
23
24
25
26
27
28
29
30
31
# 根据品牌名生产不同的汽车

# bmw 生产线
class bmw:

def __str__(self):
return "我生产了一台BMW汽车"

# benz 生产线
class benz:

def __str__(self):
return "我生产了一台Benz汽车"

# 创建一个汽车工厂
class MachineFactory:

def build(self, brand):
if brand == "bmw":
machine = bmw()
print(machine)
elif brand == "benz":
machine = benz()
print(machine)


machineFactory = MachineFactory()

# 根据不同的品牌名生产不同的汽车
machineFactory.build("bmw")
machineFactory.build("benz")

3.The Builder Pattern 构造模式

控制复杂对象的构造

当对象需要多个部分组合起来一步步创建,并且创建和表示分离的时候。可以这么理解,你要买电脑,工厂模式直接返回一个你需要型号的电脑,但是构造模式允许你自定义电脑各种配置类型,组装完成后给你。这个过程你可以传入builder从而自定义创建的方式。

假如我们要生产一台Computer, 我们需要首先定义一个Computer类, 他表示了一个Computer由那些组件组成. 然后定义一个Builer, Builer用于组装Computer. 最后定义一个Enginner, 工程师告诉Builer用那些配件参数生产Computer, 然后得到一台根据具体参数生产的Computer

1
2
3
4
5
6
7
8
9
10
11
12
13
14
15
16
17
18
19
20
21
22
23
24
25
26
27
28
29
30
31
32
33
34
35
36
37
38
39
40
41
42
43
44
45
46
47
48
49
50
51
52
53
54
55
56
57
58
59
60
61
62
63
64
65
66
67
68
69
# 首先我们先定义一个 Computer 类
# 它表示一个 Computer 都由那些参数设备组成
class Computer:

def __init__(self, serialNumber):
self.serial = serialNumber
self.memory = None
self.ssd = None
self.gpu = None

def __str__(self):
info = """
Memory: {}GB
SSD : {}GB
Graphics Card: {}
""".format(
self.memory,
self.ssd,
self.gpu
)
info = "\n".join(list(filter(lambda x: x.strip(), info.split("\n"))))
return info


# 定义一个建造者, 用于构造一个 Computer
class ComputerBuilder:

def __init__(self):
self.computer = Computer("W540")

def setMemory(self, amount):
self.computer.memory = amount

def setSSD(self, amount):
self.computer.ssd = amount

def setGPU(self, amount):
self.computer.gpu = amount


# 定义一个工程师, 他告诉建造者该如何构造一个 Computer
class Engineer:

def __init__(self):
self.builder = None

def buildComputer(self, memory, ssd, gpu):
self.builder = ComputerBuilder()
self.builder.setMemory(memory)
self.builder.setSSD(ssd)
self.builder.setGPU(gpu)

@property
def computer(self):
return self.builder.computer


# 接下来我们创建一个 engineer 实例
enginner = Engineer()
# engineer 构造了一个 computer
enginner.buildComputer(
memory=32,
ssd=1024,
gpu="GeForce RTX 3090"
)
# 获得 computer
computer = enginner.computer
print(computer)

4.The Prototype Pattern 原型模式

解决对象拷贝的问题

可以使用Python内置的copy模块实现. 拷贝分为深拷贝和浅拷贝, 这里我觉得有点像C里面的指针. 浅拷贝相当于复制了对象的指针, 还是指向同一个对象, 而深拷贝则完全复制了一个新的对象.
深拷贝的优点是对象之间完全独立互不影响, 但是这个操作会比较消耗资源.
浅拷贝的优点是仅仅复制了指向对象的指针, 因为引用的都是同一个对象, 这个操作比深拷贝消耗的资源要少得多, 但是因为指向同一个对象, 所以当对象需要进行某些操作时候要慎重考虑.

1
2
3
4
5
6
7
8
9
10
11
12
13
14
15
16
17
18
19
20
21
22
23
24
25
26
27
28
29
30
31
32
33
34
35
36
37
38
39
40
41
42
43
44
45
46
47
48
49
50
51
52
53
54
55
56
57
58
59
60
61
62
63
import json
import copy


# 定义一本书
class Book:

def __init__(self, name, author, price, **kwargs):
self.name = name
self.author = author
self.price = price
self.__dict__.update(kwargs)

def __str__(self):
print(self.__dict__.keys())
attrNames = list(self.__dict__.keys())
attrs = dict()
for name in attrNames:
attrs.setdefault(name, getattr(self, name))
return json.dumps(attrs, indent=4)


class Prototype:

def __init__(self):
self.objects = {}

def register(self, identifier, obj):
self.objects[identifier] = obj

def unregister(self, identifiter):
del self.objects[identifiter]

def clone(self, identifier, **kwargs):
"""克隆一个对象, 即对象的深拷贝"""
obj = self.objects.get(identifier)
if not obj:
raise ValueError("Incorrect object identifier: {}".format(identifier))
newObj = copy.deepcopy(obj)
# 实现拷贝时自定义更新
newObj.__dict__.update(kwargs)
return newObj


if __name__ == '__main__':

b1 = Book(
name="Python程序设计",
author="闹闹",
price="99",
edition="1"
)

property = Prototype()
cid = "A123456789"
# 注册了一本新书
property.register(cid, b1)
# 克隆一个新对象
b2 = property.clone(cid, edition="2")

for i in (b1, b2):
print(i)
print("ID b1: {} b2: {}".format(id(b1), id(b2)))

5.The Adapter Pattern 适配器模式

解决接口不兼容问题

未完待续…

区别实例属性和类属性

类属性

这样定义的属性是类属性, 我们 new 两个实例测试下

1
2
3
4
5
6
7
8
9
10
11
class MyClass(object):

name: list = list()


if __name__ == '__main__':

m1 = MyClass()
m2 = MyClass()
print(id(m1.name))
print(id(m2.name))

可以看到指向了相同的地址

1
2
3
4
2078100290056
2078100290056

Process finished with exit code 0

实例属性

__init__ 方法中创建的属性是实例属性

1
2
3
4
5
6
7
8
9
10
11
12
class MyClass(object):

def __init__(self):
self.name: list = list()


if __name__ == '__main__':

m1 = MyClass()
m2 = MyClass()
print(id(m1.name))
print(id(m2.name))

可以看到指向了不同的地址

1
2
3
4
1631300614792
1631300614856

Process finished with exit code 0

总结

类属性属于类所有, 所有实例共享一个属性

实例属性属于实例所有, 每个实例各自独享一个属性

注意

不要对实例属性和类属性使用相同的名字,否则将产生难以发现的错误。

https://www.liaoxuefeng.com/wiki/1016959663602400/1017594591051072

查询重复记录

表名: table_name

查询列: column_name

单个条件

1
2
3
4
select * from table_name 
where column_name in(select column_name from table_name
group by column_name having count(column_name)>1)
order by column_name;

多个条件

1
2
3
4
5
6
7
8
9
10
select * from table_name as t1 
where
(
select count(*) from table_name t2
where
t2.column_name_1=t1.column_name_1 and
t2.column_name_2=t1.column_name_2 and
t2.column_name_3=t1.column_name_3 and
t2.column_name_4=t1.column_name_4
)>1;

删除重复只保留一个

表名: table_name

查询列: column_name

单个条件

1
2
3
delete from table_name 
where column_name in (select column_name from table_name group by column_name having count(column_name) > 1)
and ctid not in (select min(ctid) from table_name group by column_name having count(column_name)>1);

多个条件

1
2
3
4
5
6
7
8
9
delete from table_name 
where (column_name1,column_name2,column_name3) in
(select column_name1,column_name2,column_name3 from table_name
group by column_name1,column_name2,column_name3
having count(*) > 1)
and ctid not in
(select min(ctid) from table_name
group by column_name1,column_name2,column_name3
having count(*)>1);

https://blog.csdn.net/fm0517/article/details/61202099

查看日志

1
docker logs container_name_or_id

Docker 日志目录

1
/var/lib/docker/containers/container_id

设置Docker容器日志大小, 以docker-compose文件为例

1
2
3
4
5
6
7
v2ray: 
image: v2ray
restart: always
logging:
driver: "json-file"
options:
max-size: "5g"

日志被限制在5g大小.

更改全局设置

增加项文件

1
2
3
4
{
"log-driver":"json-file",
"log-opts": {"max-size":"500m", "max-file":"3"}
}

到文件, 如果没有则新建.

1
/etc/docker/daemon.json

重启docker

1
service docker restart

Your local changes to the following files would be overwritten by merge

错误描述

1
2
3
4
5
6
e66515c..389e67f  master     -> gitlab/master
error: Your local changes to the following files would be overwritten by merge:
config/clash/haikou.yaml
config/clash/yuncheng.yaml
Please commit your changes or stash them before you merge.
Aborting

方法一

放弃本地修改,直接覆盖

1
2
git reset --hard
git pull

仓库地址

1
https://registry.hub.docker.com/r/certbot/certbot

官方参考

1
https://certbot.eff.org/docs/install.html#running-with-docker

pull 镜像

1
docker pull certbot/certbot

基于内置webserver部署

这个方案的坏处是需要启动内置的nginx服务器占用80和443端口.

创建两个目录

1
2
/etc/letsencrypt
/var/lib/letsencrypt

运行镜像

1
2
3
4
5
docker run -it --rm --name certbot \
-v "/etc/letsencrypt:/etc/letsencrypt" \
-v "/var/lib/letsencrypt:/var/lib/letsencrypt" \
-p 80:80 -p 443:443 \
certbot/certbot certonly

提问用webserver部署或者用webroot

1
2
3
4
5
6
7
How would you like to authenticate with the ACME CA?
- - - - - - - - - - - - - - - - - - - - - - - - - - - - - - - - - - - - - - - -
1: Spin up a temporary webserver (standalone)
2: Place files in webroot directory (webroot)
- - - - - - - - - - - - - - - - - - - - - - - - - - - - - - - - - - - - - - - -
Select the appropriate number [1-2] then [enter] (press 'c' to cancel): 1

我们用临时服务器方便点所以选择1, 如果用2的话需要自己设置验证文件.

提示你输入邮箱

1
2
3
Plugins selected: Authenticator standalone, Installer None
Enter email address (used for urgent renewal and security notices)
(Enter 'c' to cancel):

不用看了,就是我已阅读并同意….

1
2
3
4
5
6
Please read the Terms of Service at
https://letsencrypt.org/documents/LE-SA-v1.2-November-15-2017.pdf. You must
agree in order to register with the ACME server at
https://acme-v02.api.letsencrypt.org/directory
- - - - - - - - - - - - - - - - - - - - - - - - - - - - - - - - - - - - - - - -
(A)gree/(C)ancel: a

想不想接受他给你发邮件

1
2
3
4
5
6
7
8
Would you be willing, once your first certificate is successfully issued, to
share your email address with the Electronic Frontier Foundation, a founding
partner of the Let's Encrypt project and the non-profit organization that
develops Certbot? We'd like to send you email about our work encrypting the web,
EFF news, campaigns, and ways to support digital freedom.
- - - - - - - - - - - - - - - - - - - - - - - - - - - - - - - - - - - - - - - -
(Y)es/(N)o: y

输入你的域名, 例如: yourself.hostname.xxx, 这里不要输错了, 输错无法后退, 只能重来.

1
2
Please enter in your domain name(s) (comma and/or space separated)  (Enter 'c'
to cancel): yourself.hostname.xxx

看到

1
2
3
4
5
6
7
8
9
10
11
12
13
14
IMPORTANT NOTES:
- Congratulations! Your certificate and chain have been saved at:
/etc/letsencrypt/live/yourself.hostname.xxx/fullchain.pem
Your key file has been saved at:
/etc/letsencrypt/live/yourself.hostname.xxx/privkey.pem
Your cert will expire on 2020-12-13. To obtain a new or tweaked
version of this certificate in the future, simply run certbot
again. To non-interactively renew *all* of your certificates, run
"certbot renew"
- If you like Certbot, please consider supporting our work by:

Donating to ISRG / Let's Encrypt: https://letsencrypt.org/donate
Donating to EFF: https://eff.org/donate-le

完成

证书保存在

1
/etc/letsencrypt/live/yourself.hostname.xxx/

使用阿里源进行安装

CentOS7用阿里源安装Docker

1
2
3
4
5
6
7
8
9
# step 1: 安装必要的一些系统工具
sudo yum install -y yum-utils device-mapper-persistent-data lvm2
# Step 2: 添加软件源信息
sudo yum-config-manager --add-repo https://mirrors.aliyun.com/docker-ce/linux/centos/docker-ce.repo
# Step 3: 更新并安装Docker-CE
sudo yum makecache fast
sudo yum -y install docker-ce
# Step 4: 开启Docker服务
sudo service docker start

根据CentOS7的安装方式安装遇到如下问题。
错误描述

1
2
3
4
5
6
7
8
9
10
11
12
13
上次元数据过期检查:0:00:11 前,执行于 20200610日 星期三 020521秒。
错误:
问题: package docker-ce-3:19.03.11-3.el7.x86_64 requires containerd.io >= 1.2.2-3, but none of the providers can be installed
- cannot install the best candidate for the job
- package containerd.io-1.2.10-3.2.el7.x86_64 is excluded
- package containerd.io-1.2.13-3.1.el7.x86_64 is excluded
- package containerd.io-1.2.13-3.2.el7.x86_64 is excluded
- package containerd.io-1.2.2-3.3.el7.x86_64 is excluded
- package containerd.io-1.2.2-3.el7.x86_64 is excluded
- package containerd.io-1.2.4-3.1.el7.x86_64 is excluded
- package containerd.io-1.2.5-3.1.el7.x86_64 is excluded
- package containerd.io-1.2.6-3.3.el7.x86_64 is excluded
(尝试添加 '--skip-broken' 来跳过无法安装的软件包 或 '--nobest' 来不只使用最佳选择的软件包)

使用阿里源安装containerd.io安装不低于1.2.2-3的版本

1
yum install -y https://mirrors.aliyun.com/docker-ce/linux/centos/7/x86_64/edge/Packages/containerd.io-1.2.13-3.2.el7.x86_64.rpm

然后继续根据CentOS7的安装方法安装即可。

参考链接:https://blog.csdn.net/RtxTitanV/article/details/106550640

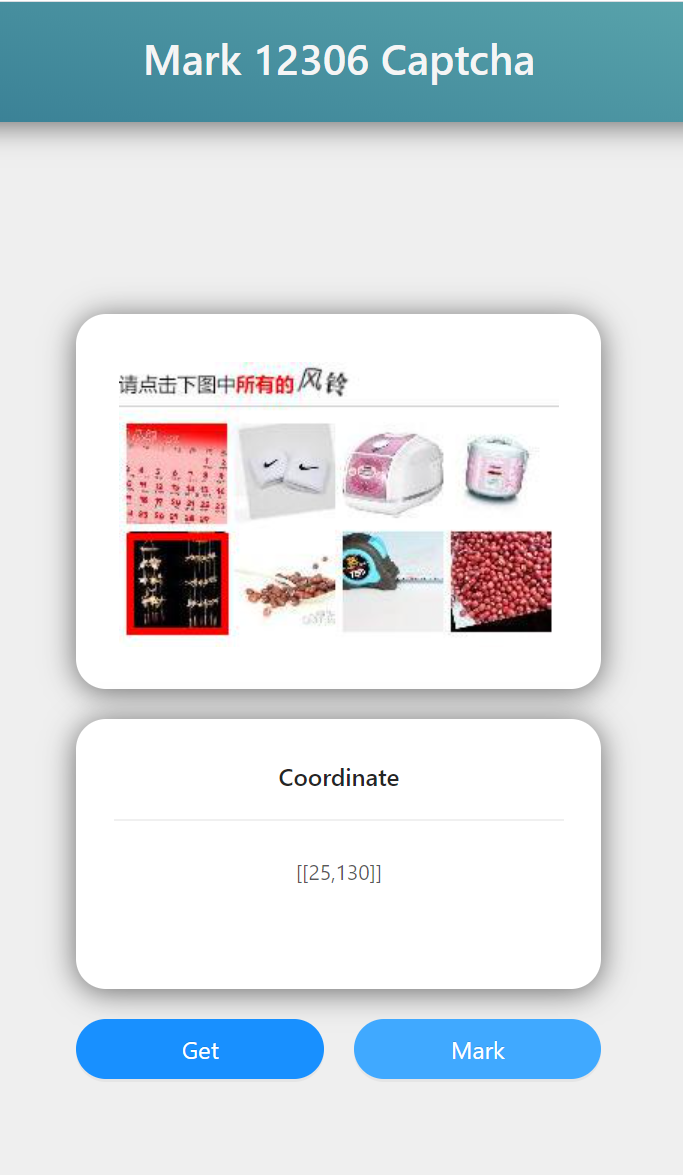
12306验证码识别

这是一个基于Flask,Tensorflow,Keras实现的12306验证码识别接口。

搭建好的接口:https://mark12306captcha.wudinaonao.com

拉取镜像

1
docker pull wudinaonao/flask-mark-12306-captcha

启动镜像

docker

1
docker run -dit -p 8848:8848 wudinaonao/flask-mark-12306-captcha

docker compose

1
2
3
4
5
6
7
8
version: "3.1"
services:
flask-mark-12306-captcha:
image: wudinaonao/flask-mark-12306-captcha
container_name: flask-mark-12306-captcha
ports:
- 8848:8848
restart: always

一个用于验证的前端

访问:http://yourhostname:8848

20200609204007

API

获取验证码

从12306获取一张测试的验证码

  • Request

    • Method: GET
    • Headers
      • Content-Type: application/json
    • URL: /Mark12306Captcha/api/v1.0/get/captcha
  • Response

    • Headers
      • Content-Type: application/json
    • Body
      1
      2
      3
      4
      5
      {
      "status": "success",
      "message": "mark successfully",
      "result": "captcha base64 string"
      }

识别

Full

  • Request

    • Method: POST
    • Headers
      • Content-Type: application/json
    • URL: /Mark12306Captcha/api/v1.0/mark
    • Body
      • {"originCaptcha":"captcha base64 string"}
  • Response

    • Headers
      • Content-Type: application/json
    • Body
      1
      2
      3
      4
      5
      6
      7
      8
      9
      10
      11
      12
      13
      14
      15
      16
      17
      18
      19
      20
      21
      22
      {
      "status": "success",
      "message": "mark successfully",
      "result": {
      "originCaptcha": "origin captcha base64 string",
      "ids": [
      5,
      7
      ],
      "results": [
      [
      190,
      165
      ],
      [
      260,
      141
      ]
      ],
      "markedCaptcha": "marked captcha base64 string"
      }
      }
  • Result 解释说明

    • ids 图片的编号
      • 0 2 4 6
        1 3 5 7
    • results 一个列表,每个元素是标记的坐标
    • markedCaptcha 绘制好标记结果的验证码Base64字符串

Lite

  • Request

    • Method: POST
    • Headers
      • Content-Type: application/json
    • URL: /Mark12306Captcha/api/v1.0/mark/lite
    • Body
      • {"originCaptcha":"captcha base64 string"}
  • Response

    • Headers
      • Content-Type: application/json
    • Body
      1
      2
      3
      4
      5
      6
      7
      8
      9
      10
      11
      12
      13
      14
      {
      "status": "success",
      "message": "mark successfully",
      "result": [
      [
      168,
      144
      ],
      [
      274,
      125
      ]
      ]
      }
    • Result 解释说明参见上面

License

Apache License