0%

denied: requested access to the resource is denied

1
2
3
4
5
6
7
8
9
10
11
12
13
14
15
16
The push refers to repository [docker.io/library/flask-mark-12306-captcha]
0566a0ade762: Preparing
a82f13d5c08d: Preparing
6680b518709b: Preparing
42d3338c1387: Preparing
380d9d1be624: Preparing
5bf497fc7ae4: Waiting
079e0a70bca0: Waiting
569e5571a3eb: Waiting
697765a85531: Waiting
8c39f7b1a31a: Waiting
88cfc2fcd059: Waiting
760e8d95cf58: Waiting
7cc1c2d7e744: Waiting
8c02234b8605: Waiting
denied: requested access to the resource is denied

解决

push 的时候加上用户名

1
docker push <username>/<image name>:<tag name>

An image does not exist locally with the tag

1
2
3
(base) root@ubuntu:/home/ubuntu/docker/python/FlaskMark12306Captcha# docker push wudinaonao/flask-mark-12306-captcha:v1
The push refers to repository [docker.io/wudinaonao/flask-mark-12306-captcha]
An image does not exist locally with the tag: wudinaonao/flask-mark-12306-captcha

解决

本地不存在指定的镜像,可能构建镜像的时候没有指定tag

1
docker tag <old image name> <username>/<new image name>:<tag name>

例如

1
docker tag flask-mark-12306-captcha wudinaonao/flask-mark-12306-captcha:v1

完成

20200609193818

1
2
3
ln -fs /lib/systemd/system/rc-local.service /etc/systemd/system/rc-local.service
cd /etc/systemd/system/
nano rc-local.service

rc-local.service 内容

1
2
3
4
5
6
7
8
9
10
11
12
13
14
15
16
17
18
19
20
21
22
23
24
25
26
27
#  SPDX-License-Identifier: LGPL-2.1+
#
# This file is part of systemd.
#
# systemd is free software; you can redistribute it and/or modify it
# under the terms of the GNU Lesser General Public License as published by
# the Free Software Foundation; either version 2.1 of the License, or
# (at your option) any later version.

# This unit gets pulled automatically into multi-user.target by
# systemd-rc-local-generator if /etc/rc.local is executable.
[Unit]
Description=/etc/rc.local Compatibility
Documentation=man:systemd-rc-local-generator(8)
ConditionFileIsExecutable=/etc/rc.local
After=network.target

[Service]
Type=forking
ExecStart=/etc/rc.local start
TimeoutSec=0
RemainAfterExit=yes
GuessMainPID=no

[Install]
WantedBy=multi-user.target
Alias=rc-local.service

创建 rc.local 文件

1
touch /etc/rc.local

赋予可执行权限

1
chmod 755 /etc/rc.local

编辑 rc.local

1
nano /etc/rc.local

文件内容

1
2
3
4
5
6
#!/bin/bash

# 这里开机执行的脚本
# 要卸载 exit 0 之前

exit 0

完成。

参考链接 https://blog.csdn.net/zhengchaooo/article/details/80202599

方法一

返回值为字符串类型

1
2
import os
os.getenv("KEY")

方法二

返回值为bytes类型

1
2
import os
os.getenvb("KEY")

错误描述

1
2
3
4
5
6
7
8
9
10
11
12
13
14
15
16
Traceback (most recent call last):
File "Scheduler.py", line 96, in <module>
scheduler.start()
File "Scheduler.py", line 78, in start
CronTrigger.from_crontab(Config.SPIDER_INTERVAL)
File "/root/anaconda3/envs/caoliu/lib/python3.6/site-packages/apscheduler/triggers/cron/__init__.py", line 103, in from_crontab
day_of_week=values[4], timezone=timezone)
File "/root/anaconda3/envs/caoliu/lib/python3.6/site-packages/apscheduler/triggers/cron/__init__.py", line 58, in __init__
self.timezone = get_localzone()
File "/root/anaconda3/envs/caoliu/lib/python3.6/site-packages/tzlocal/unix.py", line 165, in get_localzone
_cache_tz = _get_localzone()
File "/root/anaconda3/envs/caoliu/lib/python3.6/site-packages/tzlocal/unix.py", line 90, in _get_localzone
utils.assert_tz_offset(tz)
File "/root/anaconda3/envs/caoliu/lib/python3.6/site-packages/tzlocal/utils.py", line 46, in assert_tz_offset
raise ValueError(msg)
ValueError: Timezone offset does not match system offset: 0 != 28800. Please, check your config files.

开发机上一切正常,部署到服务器上出现这个问题。

服务器的时区和apscheduler不一样。

解决方案

在 apscheuler 里指定时区

查看服务器上的时区

1
cat /etc/timezone

在 apscheuler 里指定时区

20200606173447

Ubuntu 版本 20.04 LTS

1
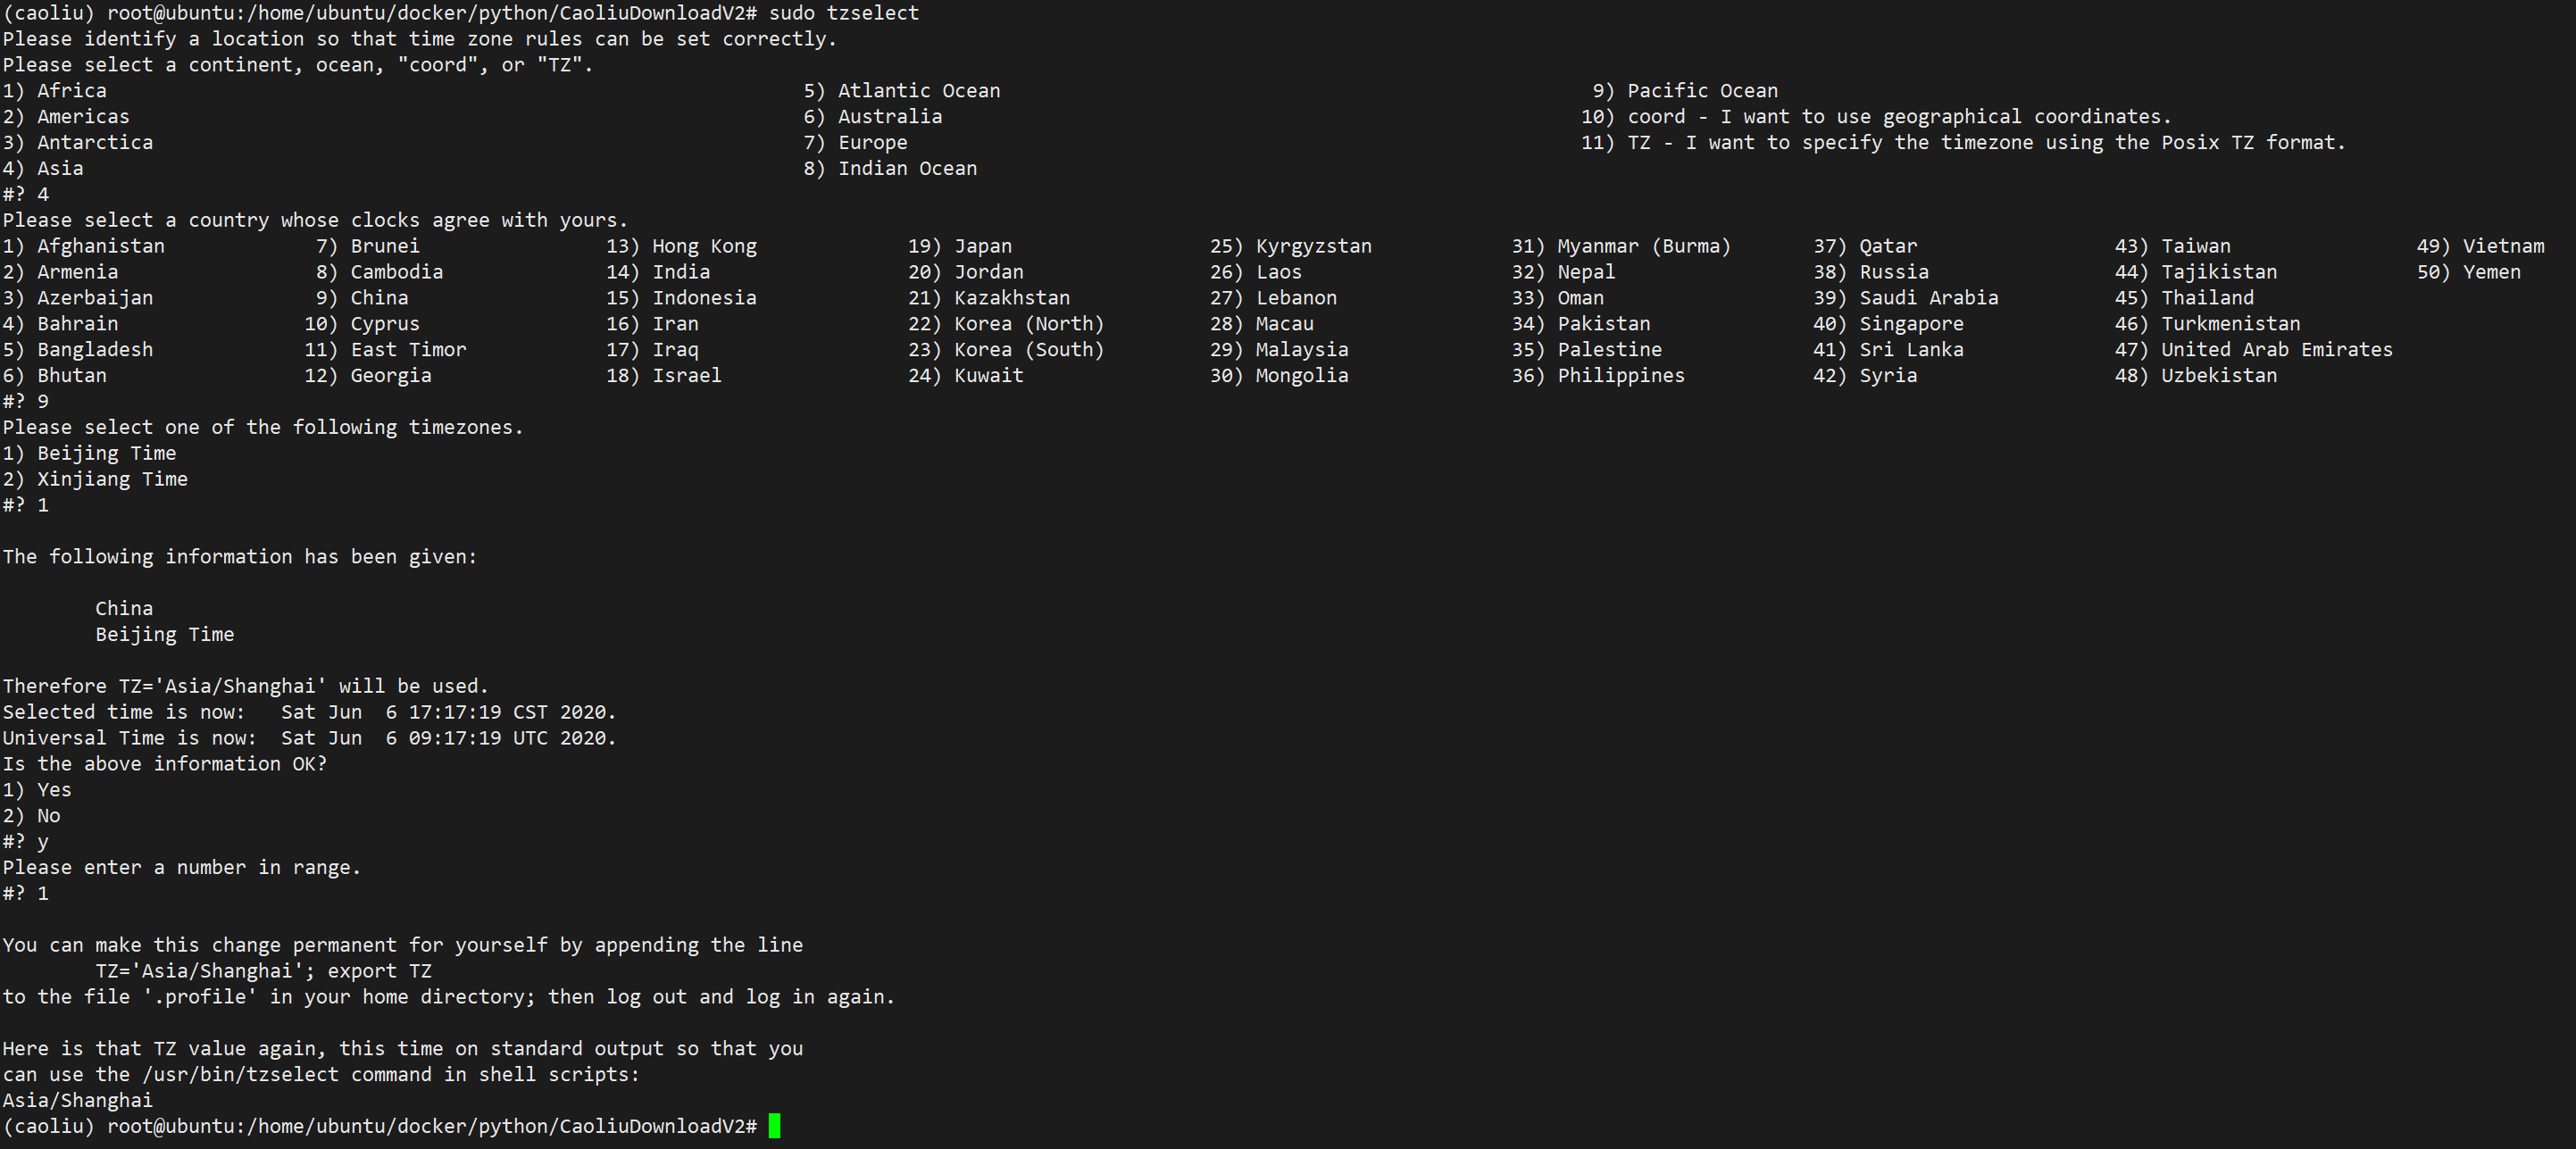
sudo tzselect

根据提示选择你需要的时区

20200606171802

例如我选择的是Asia-China-Beijing Time

创建一个软连接

1
ln -sf /usr/share/zoneinfo/Asia/Shanghai /etc/localtime

查看结果

1
date -R

挂载远程目录//192.168.1.3/download/porn到本地/download/porn

1
mount -t cifs //192.168.1.3/download/porn /download/porn -o username=test,password=test,domain=DOMAIN,vers=1.0

编码

1
2
3
4
5
import base64

bytes = b"wudinaonao"
base64.b64encode(bytes)

输出

1
'd3VkaW5hb25hbw=='

解码

1
2
3
4
5
6
import base64

bytes = b"wudinaonao"
encode = base64.b64encode(bytes)
base64.b64decode(encode, "utf-8")

输出

1
'wudinaonao'

20200603160434

前言

在ESXI下扩容磁盘是非常简单的。例如,我制作了一个通用Ubuntu镜像。

20200603160729

当我像创建一个基于Ubuntu的虚拟机时,我直接导入ESXI即可,不用重新安装一个,非常便捷。

但是我制作的这个镜像文件设置磁盘大小只有16G,在长期使用后可能磁盘空间就不够了,这个时候我们需要对磁盘进行扩容。

你可能会问为什么制作镜像的时候不设置个大点的硬盘空间?因为当ESXI进行硬盘扩容的时候,空间只能改大不能改小。

扩容

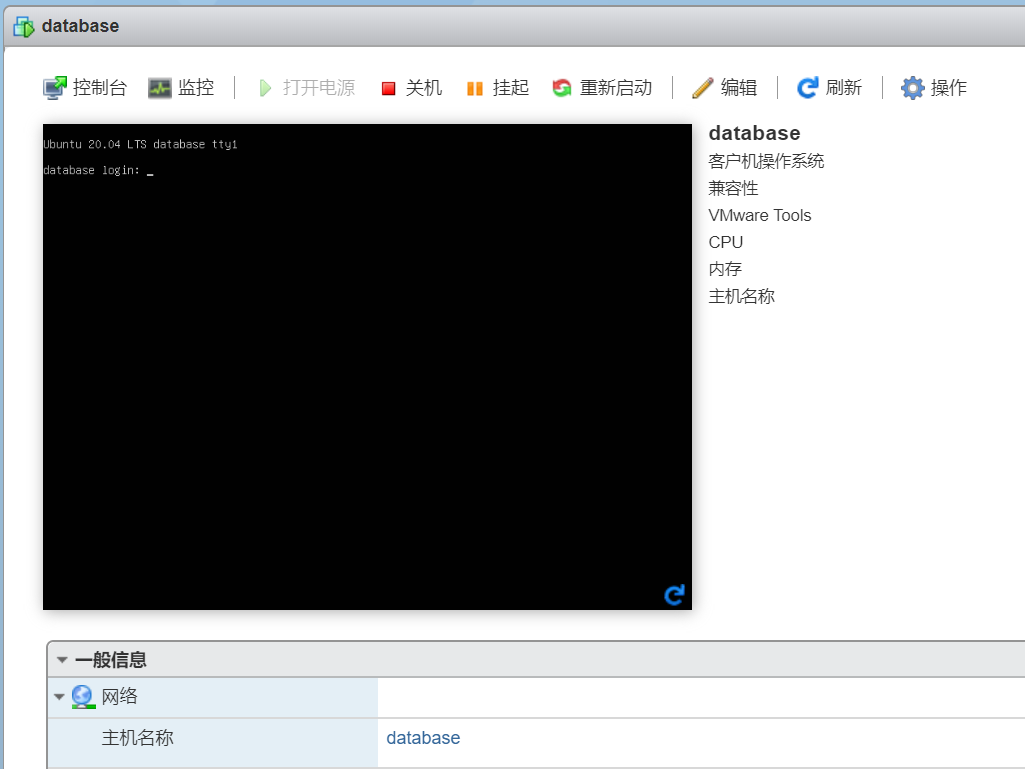
我们以Database这个虚拟机为例

20200603161130

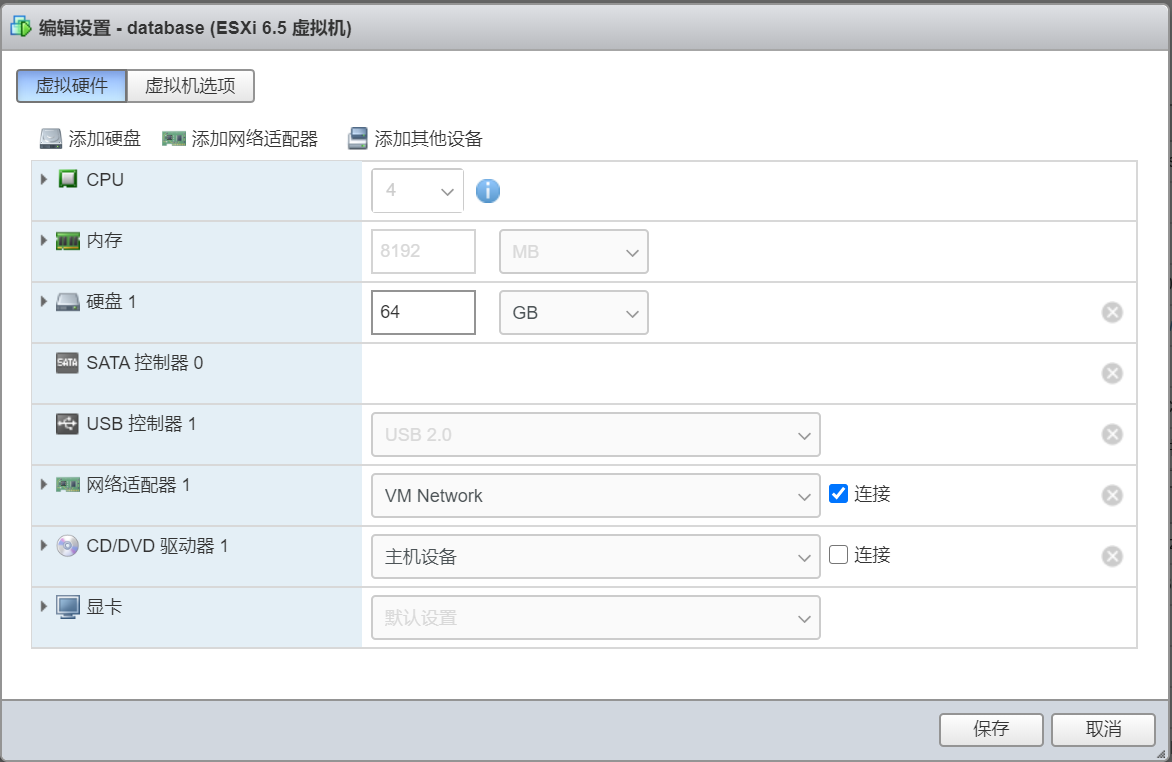
先使虚拟机处于关闭状态。然后点击编辑

20200603161200

我们把硬盘1改成64GB,保存

打开虚拟机。

登录虚拟机

1
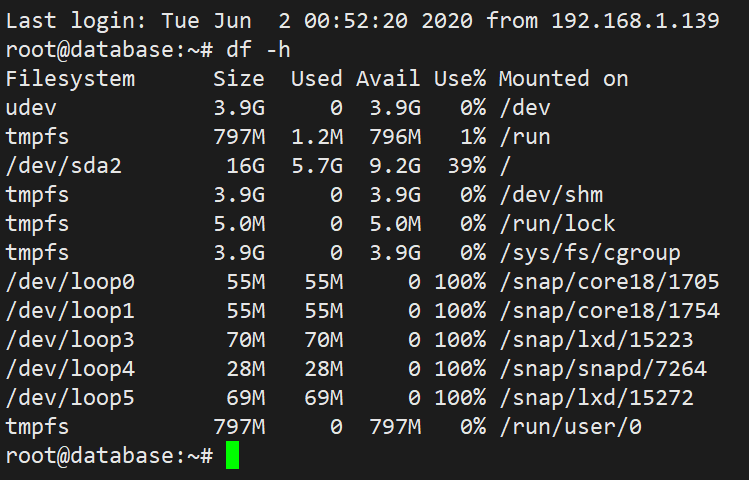
df -h

20200603161352

可以看到空间并没有增加。我们需要把扩容的空间无损增加到根目录。以下操作有风险,建议创建快照

1
2
3
4
5
6
7
8
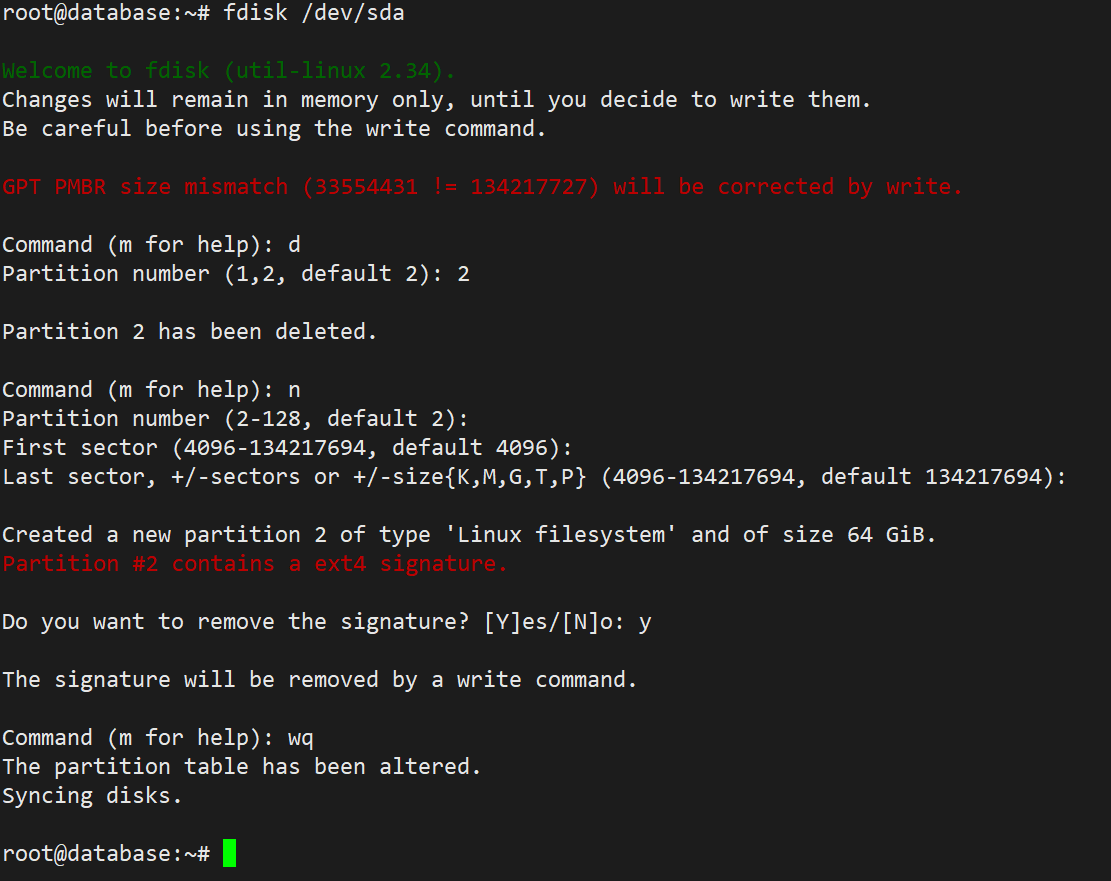
fdisk /dev/sda
d
2
n
回车(默认)
回车(默认)
y
wq

注意,我的根目录挂载在/dev/sda2,所以删除的分区号是2

20200603161840

原理就是把之间个根目录挂载的分区删除了,然后重建一个扩容的分区。

然后格式化磁盘

1
resize2fs /dev/sda2

20200603162037

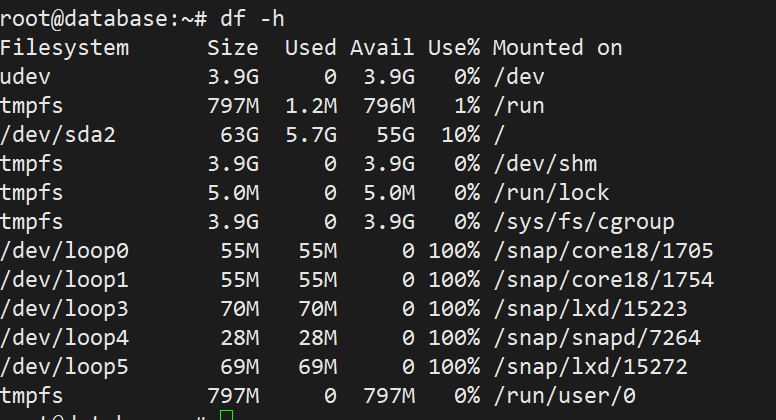
查看一下结果。

20200603162100

可以看到已经扩容成功了。

如果你像我一样,把lan口关闭了导致无法通过web进入后台。那么你可以进入通过SSH来重新启用这个接口。

1
2
cd /etc/config
vi network

找到你的lan口
更改

1
option auto '0'

1
option auto '1'

然后

1
service network restart

这样lan口便重新启用,可以登录后台了。